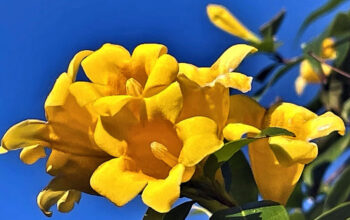

Vanda Orchid Plant (Vandas)
It is best known for producing blue blossoms, though Vanda orchids (Vandas) also produce several other shades. They have flat petals, but their roots, which hold onto trees and other objects, make them distinctive from other orchids with similar-looking blooms. Within the Orchidaceae family, it is considered a remarkably adapted genus. There are several reasons why this genus is highly regarded in horticulture, including its rich colors, long-lasting fragrance, and showy appearance.

How to Grow and Care for Vanda Orchids
Ideally, these orchids should be grown in the early spring, when they are emerging from winter dormancy. They will grow quite quickly under perfect conditions. Growing Vanda orchids is not a good option if you are a novice. Even the most skilled growers often have problems supplying certain elements to this plant.

Growing from Cuttings
- Orchids of this type are usually propagated from cuttings. Vanda orchids produce many small, leafy offshoots that usually grow just above the main root system. Whenever one of the offshoots has two or three leaves and aerial roots, the cutting is ready for propagation.
- To cut off the offshoot, carefully slice the leaves and roots from the offshoot with a sterilized garden-cutting tool.
- In a mix of orchid-growing media, replant the shoots. To ensure your plant’s success, use containers with adequate air circulation and drainage, such as baskets or clay pots.
- Ensure that the growing medium remains constantly moist so the roots can anchor themselves to it.
- Plants should be watered and fed in the same way they would be for established plants.
Sunlight
Vanda orchids require at least six to eight hours of sunlight, with Vandas being evergreen when they get bright light. Keep your Vanda orchid out of direct sunlight but in a bright place. Despite the winter months, indoor plant lights can keep them from sulking if you do not have a window. Certain vanda species demand more sunlight than others, so make sure you know which one you have.
Soil
Potted or basket-grown Vandas are both suitable. It is best to use pots in most household conditions since they maintain more moisture around the roots. Orchids of this species are naturally found in rocky habitats with scarce soil. As their roots reach for nearby trees and other objects, they wander through the air. A soilless medium such as bark, peat moss, or earth may be added to the basket to hold the plant in place. Alternatively, you could use a potting medium designed specifically for orchids. A plant’s roots will eventually hook to the basket and support it.
Watering
Ensure that the roots are thoroughly dipped in water once or twice a week. Put the roots in water and let them absorb for one minute. Once the container has been drained completely, rinse it thoroughly. As you water and drain the container, be sure to hold it at the bottom. Vanda orchids require regular watering during the summer and less frequent watering during the winter. Your orchids can die if they receive too much water.
Temperature and Humidity
It is preferred that Vandas live in temperatures above 65 degrees Fahrenheit. Even though they can endure cooler temperatures, prolonged exposure to cold can adversely impact a plant’s development and flowering. For up to a year, flowering can be delayed by temperatures below 50 degrees Fahrenheit.
The same is valid for vandas, which require high humidity to thrive. Ideally, they should be kept at a humidity level of around 80 percent, although 60 percent is sufficient. If you want to boost the humidity in your plant, place your plant in a tray of gravel with a bit of water in it. Don’t let the roots sit directly in the water.
Fertilizer
Vandas love to feed, and plants that thrive on healthy nourishment are more likely to bloom well. Weekly fertilization with a balanced 20-20-20 fertilizer during the growing season is recommended. If you want to encourage better blooms, change to a high-phosphorus fertilizer every third application. Lower the amount of fertilizer every two to four weeks during the cool season.
Read also:
Betel leaf plants growing guide. Growing heirloom tomatoes in your garden. 9 Easy growing herbs for beginners. growing and Care Tips for Orchids. 9 Unique flowers for your amateur garden. growing gaillardia flowers from seeds. How to grow anthurium plants. Best flowers for bees and butterflies. 11 Best flowers for your Winter garden
For pin